Trong bài trước mình cùng mọi người luyện tập sử dụng custom field từ WordPress để render sang giao diện homepage của Gatsby. Thì với bài này chúng ta cùng nhau luyện tập thêm về thông qua render tin tức mới trên homepage.
Render tin tức mới lên Gatsby
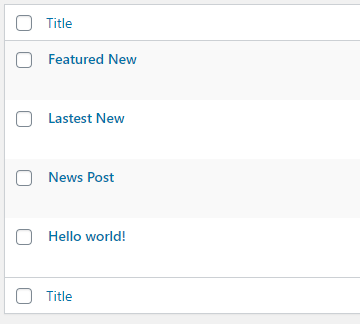
Để bắt đầu chúng ta cùng vào trong dashboard của WordPress. Mình sẽ tạo thêm 4 bài viết tạo data render trên gatsby.
Sau đó mình bật Gatsby để kiểm tra dữ liệu đổ về GraphQL. Các bạn gõ lệnh:
gatsby developSau đó các bạn vào vào GraphQL kiểm tra array object sau:
query MyQuery {
  allWordpressPost {
    edges {
      node {
        title
        slug
        featured_media {
          source_url
          alt_text
        }
      }
    }
  }
}
Và kết quả trả về như sau:
{
  "data": {
    "allWordpressPost": {
      "edges": [
        {
          "node": {
            "title": "Featured New",
            "slug": "featured-new",
            "featured_media": {
              "source_url": "http://localhost/gatsby-wp/wp-content/uploads/2020/05/gatbyjs-sec-2-1.jpg",
              "alt_text": ""
            }
          }
        },
        {
          "node": {
            "title": "Lastest New",
            "slug": "lastest-new",
            "featured_media": {
              "source_url": "http://localhost/gatsby-wp/wp-content/uploads/2020/05/gatbyjs-sec-2-1.jpg",
              "alt_text": ""
            }
          }
        },
        {
          "node": {
            "title": "News Post",
            "slug": "news-post",
            "featured_media": {
              "source_url": "http://localhost/gatsby-wp/wp-content/uploads/2020/05/gatbyjs-sec-2-1.jpg",
              "alt_text": ""
            }
          }
        },
        {
          "node": {
            "title": "Hello world!",
            "slug": "hello-world",
            "featured_media": {
              "source_url": "http://localhost/gatsby-wp/wp-content/uploads/2020/05/gatbyjs-sec-2-1.jpg",
              "alt_text": ""
            }
          }
        }
      ]
    }
  }
}
Tiếp theo chúng ta cùng tạo file news.js và import vào trong index.js sau đó khởi tạo và import các component cần thiết vào news.js:
import React, { Component } from 'react'
import AliceCarousel from 'react-alice-carousel'
import 'react-alice-carousel/lib/alice-carousel.css'
import {Link } from "gatsby"
Tiếp theo cũng giống như bài trước các bạn đưa dữ liệu query vào biến data trong file index.js sau đó truyền props vào component News
const data = useStaticQuery(graphql`
    {
      allWordpressPost {
        edges {
          node {
            title
            slug
            featured_media {
              source_url
              alt_text
            }
          }
        }
      }
    }
  `)
Và truyền props vào component News
<News newList={data.allWordpressPost.edges} />
Sau đó các bạn vào news.js để lấy props
export default class News extends Component {
  state = {
    responsive: { 1024: { items: 4} },
  } render() {
    const { responsive} = this.state
    const handleOnDragStart = (e) => e.preventDefault();
    const{sliderNewsData} = this.props;
    const elm = sliderNewsData.map((sliderItem,index) => {
      return (
        <Link key={index} className="carousel" onDragStart={handleOnDragStart} to={sliderItem.node.slug}>
           <img data-src={sliderItem.node.featured_media.source_url} alt={sliderItem.node.featured_media.alt_text} className="lazyload"/>
           <h3>{sliderItem.node.title}</h3>
        </Link>
      );
    });
    return (
      <AliceCarousel
        buttonsDisabled={true}
        responsive={responsive}
        items={elm}
        autoPlayInterval={5000}
        autoPlayDirection="ltr"
        autoPlay={true}
        stopAutoPlayOnHover={true}
        mouseTrackingEnabled={true}
      />
    )
  }
}
Và các bạn reset lại gatsby các bạn sẽ thấy slider đã được render ra và việc còn lại là css cho phần news tin tức. Khi các bạn nhấn qua tin tức có thể sẽ bị báo lỗi 404.Vì hiện tại mình và các bạn chưa tạo page cho các bài post. Trong bài kế tiếp mình sẽ nói rõ hơn về cách tự động tạo page cho post.
Tổng kết
Qua bài này mình đã giúp các bạn render tin tức mới từ WordPress sang Gatsby. Và chắc hẵn cũng một phần nào giúp bản hiểu rõ hơn khi lấy dấy liệu từ WordPress thông qua GraphQL. Bài kế tiếp mình sẽ hướng dẫn các bạn làm Page template và post template trên Gatsby.